Wednesday, October 15, 2014

Jindie Nails: Coral-ing All The Jindie Junkies

*Press sample*
Hi loves! Today I have a very special post for you guys. Recently, Jen from Jindie Nails created a custom coral nail polish just for our fan group, Jindie Junkies! I received it yesterday and I had to swatch it right away. :)


Here is the description from Jindie Nails website
"Coral-ing All The Jindie Junkies was named by our very own loyal fan, friend, customer and true Jindie Junkie, Jackie Payne.  What a perfect name for this gorgeous coral shimmer polish!  This one is is a coral  shimmer polish loaded with blue, purple, pink, rose, green, gold and real silver flakies.  It's also got micro glitters in holographic gold and holographic silver.  The polish is opaque in 2-3 coats."


I was blown away by all the different colors of flakies in this polish! It is so amazing in the sunlight!


I've used 3 coats of polish here, but if your nails are shorter or less stained than mine, you will definitely be able to get away with 2. Formula was great, no issues with dragging or bald spots. This polish is very pigmented, but I experienced no staining. With all the flakies, I found that sometimes there were spots on the nail that looked "dented", but it was easy enough to cover those spots with the 2nd coat. That 2nd coat evened everything out perfectly! I used Seche Vite topcoat, and everything felt completely smooth! :)


This polish feels like a party in a bottle lol! The rainbow flakies remind me of birthday confetti, and the shade of pink is just so uplifting and fun. :) This polish actually seemed to glow, especially in shade, which was seriously hard to capture on camera. 


Coral-ing All The Jindie Junkies is a group exclusive polish, so you must be a member to join. You can see the listing by clicking here, and Jen has described how you can become a member. This polish is limited stock, so hurry!

Thanks for reading! <3
Kelly

This polish was provided to me in exchange for my review. This in no way affects my opinions of the polish; the above review reflects my true and honest opinion of this polish. For more information, please see my Disclosure Statement. 

Purple Holo Skulls

Hey everyone! I'm in a great mood today because tomorrow is my Friday! :) I hope you're all having a great week too.

Today I've got ANOTHER Robin Moses inspired design to share with you. This one felt appropriate, with this being Halloween season and all!


This is my take on a mani I saw on Robin Moses' blog (after I first found it on Google), but I wasn't able to find the Youtube tutorial for it. Robin's version actually used pink and black instead of black, but I didn't have a pink holo that I could think of and I wanted to try a different twist anyway. Here's Robin's mani:


I really like how mine came out with the purple too! :)


The sun in Ohio was NOT cooperating the da I took these, but I manage to get one shot in the sun when I was getting in my car to get groceries haha.


I started out by painting the top half of the nails black. If your halfway line isn't completely straight, it's okay because you will be adding that "bone" stripe across. I painted the tips and the accent nails using Jindie Nails Polo, a gorgeous purple linear holo. I had to take most of the photos with flash to show you all the holo goodness in Polo, but the effect is even stronger in direct sunlight. Then I used a striping brush and Wet n Wild On a Trip for the horizontal stripes. Finally, I freehanded the skulls and bows using my striping brush and a dotting tool. I topped everything off with HK Girl.


This was such a fun and kind of edgy look, even though the skull has a bow and hearts for eyes! I think it would also look great with a neon green color palette or even orange! Here is a close up of my thumb - of course the skull turned out better on the nail I never photograph. 


I loved the way this design came out! I am so thankful for Robin Moses' channel, sometimes you just hit that nail art block and you need some inspiration - she literally has a nail art look for everything you can think of! Be sure to check her out.
And don't forget to head over to Jindie Nails shop to pick up Polo and browse the rest of the pretties - I received an epic nail mail from Jen yesterday so I will have swatches up for you very soon! :)

Thanks for reading <3
Kelly

Monday, October 13, 2014

Review: Born Pretty Store brushes

Good morning everyone! I hope you had a great weekend. My mom visited and we shopped for outfits for my engagement shoot coming up next week - ahh! I'm starting to get a little nervous. But, I got just about everything I needed for the shoot, so that's one thing off my list. 

Today it's back to reality and back to work. :( But, I have another review of a Born Pretty Store product for you! I mentioned before that I love Born Pretty Store for nail art supplies. A while back, I was contacted by Daisy of BPS and asked to review some products for them. One of the items I chose was this 15 piece brush set (Item #8793). I had a few nail art brushes I had picked up here and there, but this set had every shape, length, and thickness I could imagine!


Here are the brushes I used for today's look. A medium length striper:


A dotting tool:


And a medium angled brush for cleaning up around the cuticles/edges - I love brushes like these!


I wanted to really test out what these brushes could do, so I went to Robin Moses for inspiration. I chose what looked like a more intricate design to try out the striper. This design is called Black Flowers over Orange Stripes.


I started with 2 coats of Sinful Colors Coral Riff. I really loved this shade when I first got it. It's a really pretty red/orange/pink with a slight blue shimmer. I went in with the Born Pretty Store medium striper shown above, and used Sally Hansen Sun Kissed to paint the lighter orange swirls. I did a layer of topcoat before the next step. I used black acrylic paint and the same striper to paint the black flowers and swirls. I used the dotting tool dipped in black paint to finish up, and topped it all off with HK Girl! :)


This design was easier than it looked, and it looked so cool! The striping brush was super easy to use. It's the perfect length for doing swirls - much shorted and the lines would have ended up looking chunky. I like that if you lift up on the pressure of the brush as you paint a line, it's thin enough to taper off - it makes the flower petals super simple to do!


The dotting tool worked great too. It's a medium sized dotter, so you can make bigger or smaller dots depending on how much polish you dab on the end and how hard/light you press down. I found it to be the perfect size for this design. I loved the angled brush for cleanup too. For those times when polish just happens to get on your cuticles, which is a frequent occurrence for me, I just dip the angled brush in acetone, and run it around the edge of the cuticle line. It always leaves my manis looking more crisp and professional. Here is a shot with flash to really show the contrast of colors!


This mani probably took me about 30 minutes to do, start to finish. I definitely thought it would be more complicated, but with Robin Moses' tutorial and these amazing brushes, it was simple! I couldn't wait to test out more of the brushes, so I'll have another look that I used them for, up later this week.

If this brush set looks like something you might like, you can see the listing by following the link here. This is a perfect set if you're just starting out with nail art - it really includes a brush for every kind of nail art you could want to do, it's a great variety and a great value for the money - all 15 of these brushes retail for just $10.02! But, even better - if you use my coupon code below, you can save  another 10%! And of course, shipping from Born Pretty Store is always free.


Thanks for reading! <3
Kelly

Friday, October 10, 2014

Jindie Nails Stamping

Hi everyone - TGIF!!! I'm thankful it's Friday, but wish I could enjoy it more...I've had this same headache since LAST Friday, so not at all happy about that. My usual prescription isn't working this time, and even the Toradol shot the doctor gave me yesterday only worked for a few hours. I think this is officially my longest headache! Fingers crossed it goes away soon, my mom is visiting this weekend to help me shop for outfits for my engagement photoshoot in a couple of weeks. :)

Anyway, a group I'm in called Jindie Junkies, which is a fan group for Jindie Nails polishes and their amazing creator Jen, has come up with a posting schedule for the month of October. Each day in October was assigned a different theme, and one or two Jindie Junkies signed up to create a look for each day. Myself and Shelby Lou Nails both wanted to sign up for today's theme - a stamped mani!


I started with a base of What Are You Smokin' Mirrors, one of the Jindie Nails Halloween polishes released last year. It's a grey crelly with gold and silver dots, squares and a hint of shimmer. It's a gorgeous polish on its own, but the theme was to stamp it. For some reason, this key image on my Vivid Lacquer plate (VL 028) stood out to me. Maybe because of the gold and silver, I had metal on the brain? I don't know, but I stamped using that plate and Sinful Colors Black on Black.


Can we just stop and take a second to appreciate my new lighting set up?! Thank goodness for Wondrously Polished, she opened my eyes to OttLite bulbs and the lighting in my light box is so perfect now! I got the 25W bulb that is around 5600K, and it was less than $7 at Lowe's. I didn't have to do any color correcting or editing to these photos, which is amazing for me! Now that I compare the two, I see how yellow my old light bulb was, and my photos would come out too warm, giving me lobster hands and making the polish look different than it really was. With this new bulb, I snap the pictures, crop and watermark and DONE - no more trying to mess with color balance for hours on end. Okay, I'm done raving now! :D


I first used a coat of Mentality Gloss topcoat to help prevent smearing - it worked wonderfully! I did a coat of Seche Vite on top of that to smooth out the surface and speed up dry time. I'm really impatient. After cleaning up a bit around the cuticles, I used Sunny's Cuticle Oil as always. This time, I used Pumpkin Patch - I'm so excited to pull out my fall scents again! But I'm even more excited to buy new fall scents haha, in fact - I'm placing a massive order today! :)


Overall, I really loved how this look came together. My stamping is still not perfect - I'm not sure if it ever will be. I am so envious of those bloggers who get perfectly crisp transferred images. But, I'll keep at it because I still love the look of a stamped design.

Check out Jindie Nails at her shop and on Facebook to see all of the gorgeous polishes she has to offer. Currently, she has a Halloween themed collaboration with Dollish Polish, a duo of polishes inspired by Frankenstein and his bride. These are limited edition and there aren't many left, so hurry and get one while you can! I've already ordered my set :D

Also, if you're like me and into cuticle care, today is the day that Sunny's Body Products launches the Fall Exclusive box. So far I've bought both the Summer box, and the Halloween box, and I've been beyond thrilled with the products. The value is amazing and the scents are exclusive, so they won't ever be available again outside of the box! Be sure to head over to her shop and check out the Fall Exclusive box as well as all the new scents she's added to the line for fall! I'm so excited to place my order today! :)

Thanks for reading <3
Kelly

Thursday, October 9, 2014

Monarch Butterfly

Hi guys! I'm still working on clearing out the vault of all these summer manis that I never got posted - I've gotta make room for all these fall and winter looks that will be coming up! Today I've got another one for you. 

I attempted the monarch butterfly look when I was just starting out, on a fake nail haha - it was pretty bad. Oh, look - I found photo evidence, along with some ugly animals :/


That's just embarrassing. That giraffe! Anyway, that was before I discovered Seche Vite! Or striping brushes lol. So recently, I decided to try it again!


I'd say this attempt is slightly better, wouldn't you? I did a makeup sponge gradient using mostly Sinful Colors and Sally Hansen, but I won't lie - I can't remember exactly which ones! I know I started with the yellow base, and that is Sally Hansen Insta Dri in Glow With It, and the lightest orange is Sally Hansen Insta Dri in Dreamsicle. These two were part of SH's Spring line last year, so they are not part of the core line. I forget what the medium orange shade is there (Might be Sinful Colors Citrine?) but I know I finished out the gradient with Sinful Colors Coral Riff at the tips. Which ended up pretty much completely covered by the black tip of the wings - oh well. :(


I added a coat of China Glaze Fairy Dust over the gradient before going in with my Stripe Rite striper in black to create the wing details. I used a small dotting tool to add the white dots along the edge. I topped it over with HK Girl, but I obviously didn't wait long enough for it to dry because the topcoat smeared it a bit. I wish I had known about Mentality's Gloss topcoat then!! I still like the overall look of this mani though. :) Here's a shot with flash where you can really see how the colors pop! (Sorry about that unsightly cut!)


I'm really glad I attempted this again. I still have some work to do, but I think I've improved a lot since I first started blogging! I got a lot of compliments on this look too. I think we are our worst critics. While I'm lamenting over some smeared dots, strangers in the grocery store are grabbing my hand and staring in awe, and they can't believe I did this by hand. That's always such a nice feeling - it reminds me not to be so hard on myself all the time! :)


I know a lot of you probably think this look has been done to death, but I still find it really beautiful. Especially in a different color palette! I've come across bloggers who have done a blue and purple color scheme, and I've also seen it in pink. I think I'll be trying it with some different colors. Especially now that I have the Vivid Lacquer stamping plate with the butterfly wing on it (VL 002). I bought it after doing this mani and being irritated that my lines weren't very straight, haha! So, we'll see next time how it comes out using a stamped image rather than freehand.

Thanks for reading <3
Kelly

Wednesday, October 8, 2014

Review: Born Pretty Store - Animal Print Studs

*Press sample*
Hey everyone! Today I've got a review for you of a fun product from Born Pretty Store - Animal Print Studs!! (Item ID: 14738) 
I love Born Pretty Store for nail art accessories, and these studs did not disappoint!


I couldn't wait to try these - I love studs for nail art. They're so simple and quick to use, but they can really pull a mani together. Studs are one of those nail art tools that I reach for when I want to look like I made an effort but in reality, I don't have time! :) And, the fact that these are "animal print" made me love them even more!

These studs are 3mm in size, and they come in the following colors: white, yellow, blue, green, red, and pink. For each color, there is a section of round studs and a section of square studs. You receive 300 pieces in this container, and it retails for only $3.50! I think it's a great deal. Now, onto the look I created!


I chose two colors in the square studs that I thought complemented each other really well: a light periwinkle, and a pale yellow. From there, I chose two polish colors that were similar. I used OPI I Just Can't Cope-acabana and China Glaze Fade Into Hue. Then, I added a coat of Gelous and stuck the studs in while the Gelous was still tacky.


I loved how these colors mesh together so well. The studs were super easy to apply. Some people use a wax pencil or a nail art tweezer to pick up small items like this. This might be weird, but I just lick the tip of my finger and it sticks long enough to place it on the nail. Hey, it works haha! :)


I really liked the look these studs, I definitely see myself using them more in the future. I feel like there are a lot of different types of looks you can create with these. I chose something kind of bright and fun, but with the red or the white studs, I could see myself creating a more edgy look. I can't wait to play around with some more of the different colors, and the round studs. I love that these are so versatile, there are just so many possibilities! :)


You can find these animal print studs in Born Pretty Store's shop. Here is the direct link to this product. As I mentioned, this 300 piece set retails for $3.50, but if you use my coupon code below, you will save an additional 10%! And, keep in mind that shipping from Born Pretty Store is always free.


Hope you liked this look, thanks so much for reading! <3
Kelly

Some of the products in this post were provided to me for review, in exchange for my full and honest opinions. Please see my Disclosure Statement for more information. 

Tuesday, October 7, 2014

Nail Challenge Collaborative: Stripes #1 (Pink Chevron design)

Good morning loves! Hope you're having a wonderful Tuesday! The headache I've had since last Friday has momentarily subsided a bit, so I'm hoping it stays away.

Last month, I purchased the Julie G Cruise collection when the entire set was on Groupon for I think 13.99? I can't remember exactly, but it was a great deal, so I had to get the collection! :)

I had my eye on Old San Juan for a nail art look, and I had seen this design on Pinterest that I wanted to recreate, so this is what I came up with! :) Chevrons count as stripes right?


I started with a base of Old San Juan, except on my ring finger, I started with a base of Sinful Colors Snow Me White. I then taped off parts of the nail using striping tape as well as regular scotch tape. After painting over the tape with the other colors (I used Sinful Colors Black on Black), I peeled the tape off while the polish was still wet. I used HK Girl to top it all off! :)


Overall, I was a little disappointed with my execution of this look, some of the lines didn't end up being as clean as I would have liked, but from far away, it looks good, haha! :) You have to be really quick removing all that striping tape, because if the polish starts to dry, it can get a little goopy and then it doesn't pull off in such crisp lines.


I really love Julie G Old San Juan, it's such a pretty shade of coral/pink/red. I know the colors make it look like summer, but I thought the design of the stripes makes it look sort of like a feather or a leaf, which reminds me of autumn. Here's a shot with flash that really makes the colors pop - you can really see how striking the contrast is here. 


Overall, I really liked this look, though I think the lines could have been crisper. I guess that just means I need more practice with striping tape! :) Good thing this whole month's theme is stripes! I'll get plenty of practice. :)

Thanks for reading, and don't forget to check out the other ladies' creations! <3

Kelly


Saturday, October 4, 2014

Model City Polish: Bobbing for Apples

Hey everyone! Hope you are all having a great weekend. It's pretty chilly here in Ohio this weekend, it's really starting to feel like fall! :) I love October. I've been getting more into Halloween nail art and swatches, so I have a fun Halloweeny look today!


This is Model City Polish Bobbing for Apples layered over Zoya Julieanne. This was one of Model City's scented Halloween polishes from last year, and I just love it! It smells like apples - and it STILL does! Last year I wore it over black, but I wanted to try something different this time. :)


This is just one coat of Bobbing for Apples, I dragged some of the bigger dots around a bit for spacing, but overall it applies perfectly. One coat of HK Girl to top it off and everything felt smooth. I loved this combination! :)


I love how Bobbing for Apples has those little iridescent glitters that really catch the sun. It has such a pretty sparkle.


What do you think of this combination? Do you have a favorite Model City Polish? I'd love to hear below! Be sure to check out Nina's Halloween set for this year - it's stunning!
Thanks for reading. <3

Kelly

Wednesday, October 1, 2014

Mentality Nail Polish: Black Line Holo collex (Part 2) + Diem

*Press sample*
Hey everyone! Ready for Part 2?! My overall favorites are in this group!
First thing's first, in case you missed it, yesterday I reviewed 5 of Mentality's Black Line Holo collection, which you can see by clicking here. Today, I'll be showing you the final 4, as well as a bonus shade from an amazing multichrome duo. AND, if you stick with me until the end, I have a little surprise for one lucky reader!

Let's get to it!


The first polish I have to show you today is Inhibit, described by Mentality as a dark orange holographic.


I've used 2 coats of Inhibit for these photos, followed by Mentality's Gloss topcoat. Same as yesterday - no issues to report with the formula! These are very pigmented polishes, they would all be great for stamping - however, I experienced no staining at all, which is always such a plus!


This one came across more bronze/brownish on my skin tone in the lightbox, but you can definitely see the burnt orange tone in the natural daylight photo below. This one will be great for autumn nail art for sure!


Also I had to include a flash photo to show off all the amazing holo sparkles! I just love how in certain lightings, a lot of these polishes look almost like a gradient due to the way the light hits it. :)


Oppose is described as a beige holographic.


This is one of those great nude shades that would be very appropriate for work or formal occasions, but still is very eye-catching. I've shown 2 coats of Oppose with Gloss topcoat. This is another that I felt the topcoat may have dulled the holo a bit - it was more evident before I added topcoat, but it is still stunning!


And of course, a photo with flash!


Next up is hands down, my favorite of the collection! Resist, a dark forest green holographic.


This is one of those super vibrant jewel tones that I mentioned before. That's one of the things I loved about this collection - it's such a great mix of shades that there really is something for everyone. Personally, I love bright colors like this - and the holo effect was very strong as well.


These photos show 2 coats of Resist topped with Gloss. Again, formula was wonderful - absolutely no issues to report. Completely smooth, even coverage, highly pigmented, and no staining as greens/blues sometimes can. I can't wait to try stamping with this one! Here's a shot in natural lighting, overcast day. Just look at the depth of this one - it can almost look turquoise in certain angles, like a mermaid's tale!


Lastly, a flash shot - I LOVE this one. Since this shade is kind of like a blackened green, the darker almost black shows at the edge of the cuticle when the light hits it at this angle. So cool looking! :)


And last of the Black Line Holos is Revolt, probably my second favorite of the collection (it might be a tie with Combat). Revolt is a dark purple holographic.


This is another one of those super vivid jewel tones - this type of shade reminds me of royalty! Formula was perfect, I used 2 coats plus Gloss for these photos.


And here's a flash shot - this is a gorgeous vampy shade for fall!


So, that concludes the Black Line Holo collection! It is honestly such an amazing collection. My top picks are: Resist, Revolt, and Combat...but trust me, you really need them all. ;)

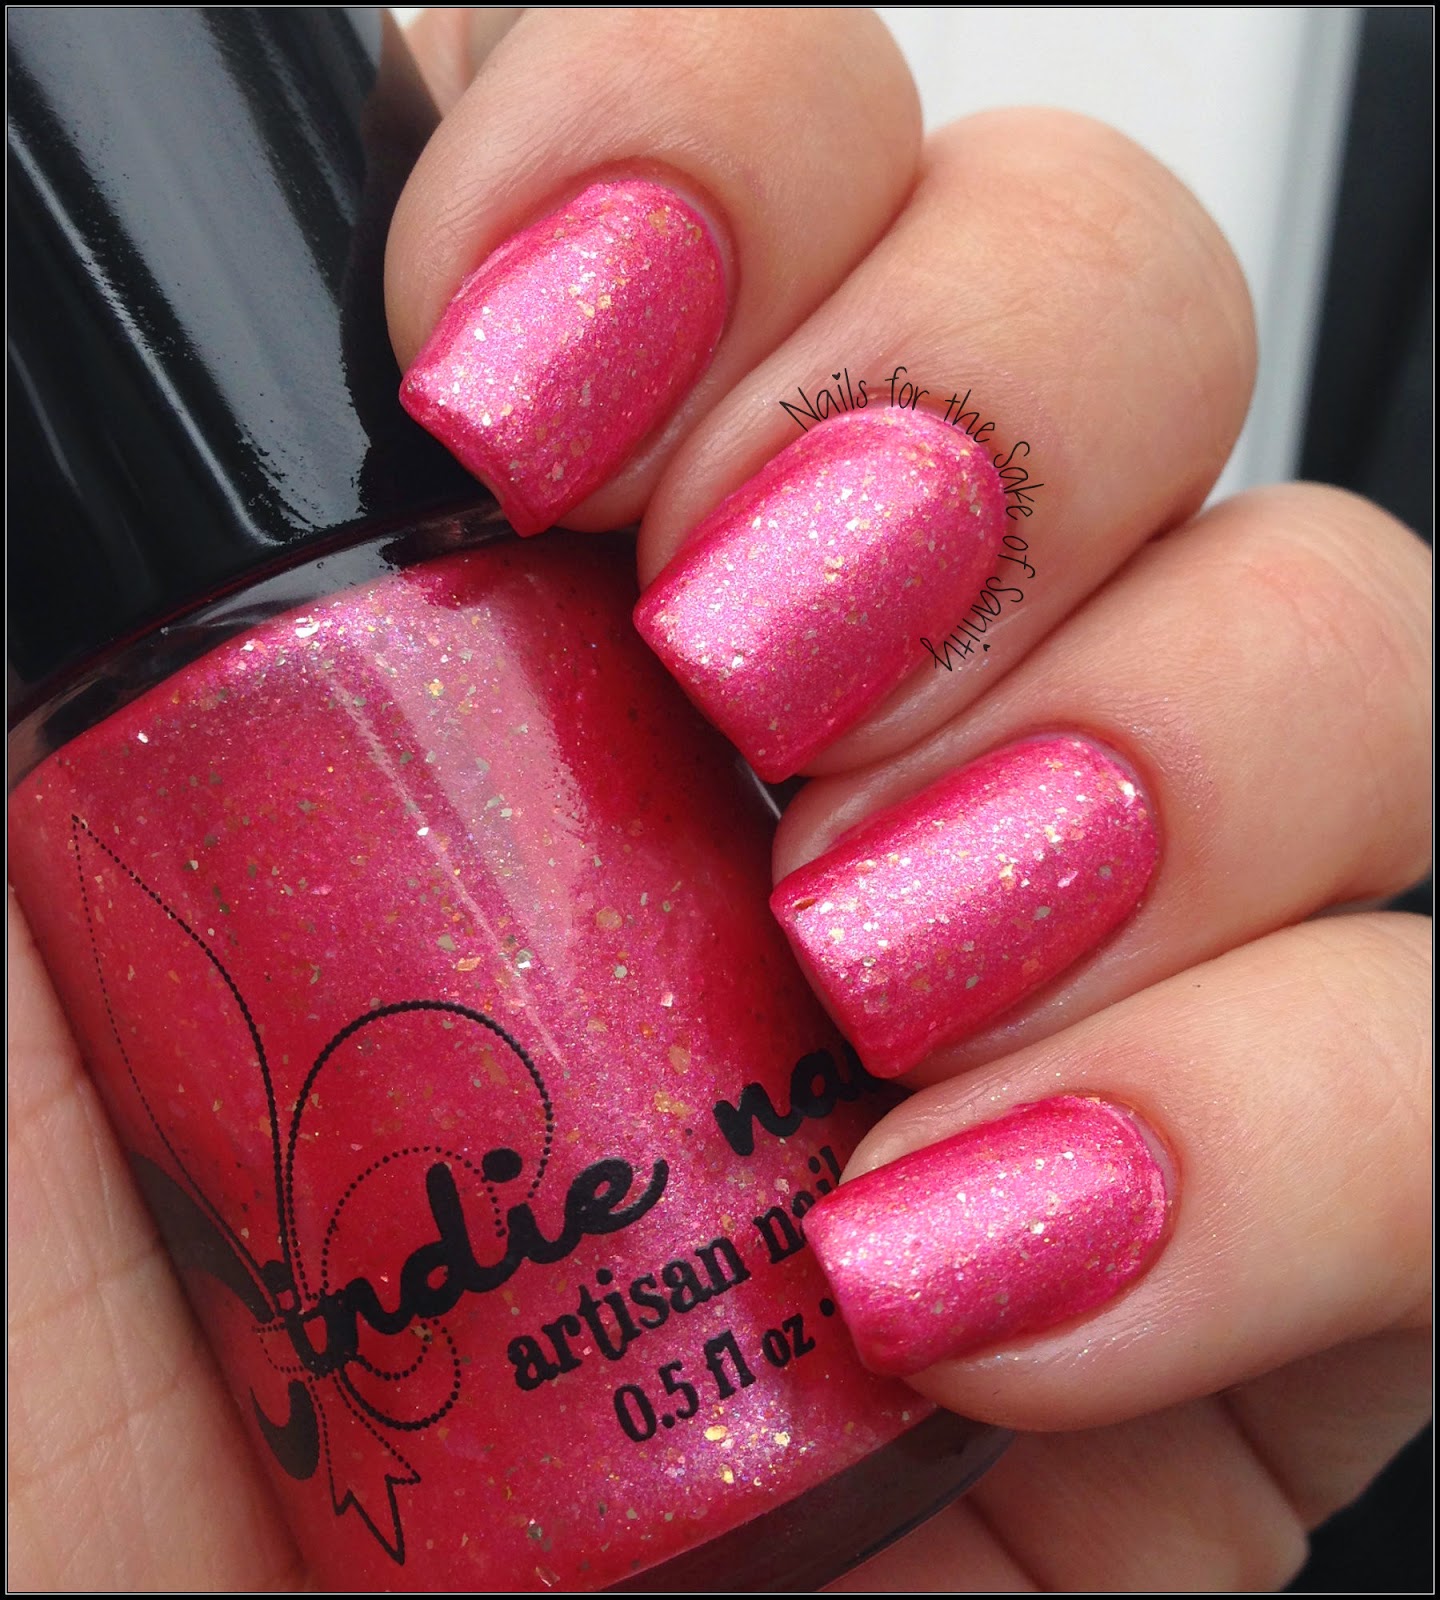
But, before I do my whole recap thing, I have one more polish to share with you! Along with the Black Line Holos, I also received Diem, which is described by Mentality as: a blackened yellow green, that shifts to green and silvery white. Diem is a gorgeous multichrome with glass flecks! 


This polish is so multidimensional, I felt like it was constantly surprising me in different angles and lights. I love shades like this - just when you think you've got an idea what color it is, move your hand a bit and you're proven wrong! :)


In some lighting, it even looked like it had blue tones. Check out this picture in natural lighting, around the edges of the nail, to see what I mean. Another cool thing about Diem is that it is SO reflective! It almost looks like a nail foil to me. And the glass flecks give it such a beautiful depth.


I actually found that Diem looked its best in the shade! Without the bright sunlight shining directly on it, it just kind of seems to glow. Absolutely love this polish!! It reminds me of a beetle's wings. :)


So Diem is actually part of a duo, along with another polish named Carpe, which is a blackened pink toned red that shifts to orange, yellow and green, with hints of blue. As I mentioned yesterday, I accidentally received an extra Dare in my box in place of Carpe, so I wanted to share a swatch with you from the always amazing Cosmetic Sanctuary. This way, you have a true picture of what you would be getting if you purchased this stunning pair!


Lisa does a great job catching the color-shift in this next photo!


Look at this bottle shot - so many different colors! I definitely think you need both of these beauties. ;)


The Black Line Holo collection retails for 65.00 as a set, which you can purchase here, and the polishes retail for 7.75 a piece if purchased individually. So you'd be saving 4.75 if you bought the entire set - just saying! Mentality has tons of other great polishes available as well, including flawless stamping polishes, jellies, holos, mattes and tons more...so be sure you look over their website. And as always, shipping is free (within US)! Carpe and Diem retail for 8.25 each.

Here's a handy recap of my swatches to help you decide which polishes you need! :)


And now, as promised, to reward you for sticking with me so long, I have a giveaway for you! There's no sense in letting that extra bottle of Dare go to waste, so I'm hosting a quick little giveaway for it! Use the Rafflecopter widget below to enter. You must be 18 or over, live in the US or have a US friend who will receive the package for you, and absolutely NO cheating will be tolerated. I will be verifying all entries.
Thanks so much for reading, and GOOD LUCK! <3

a Rafflecopter giveaway

The products in this post were provided to me in exchange for my honest review and opinion. I am not being compensated in any way for this post. Please see my Disclosure Statement for more information.