Monday, May 26, 2014

An Incredibly Eventful Weekend!!!

First, I want to preface this by saying this is going to be a long post. But, there is a lot to tell! I won't blame you if you don't make it all the way through haha. 

This weekend began like any other weekend. My boyfriend and I had planned to have a cookout with our friends and also go to the shooting range. I found out on Thursday that one of my cousins that I am really close to was having her baby! She had a little boy, and I told my friends and boyfriend that I might need to skip the cookout and range to drive home and see the baby. My friend tried to talk me out of going home and said she already bought all the food for the cookout. Eventually, I felt guilty for abandoning the cookout at the last minute and decided to go see the baby next weekend instead.

So, we started our day off at the shooting range in Vandalia. Here is our first target (left) and our friends' target (right). 


This is me. I didn't realize my friend was taking pictures! That's my gun that I bought a few weekends back. :)


We had a lot of fun! Next up was the cookout. I made my dad's famous recipe pasta salad and it was sooo yummy!


I snapped a quick pic of "man bonding time" while they were getting ready to grill our food. Everything was SO good! :) We had hamburgers, hot dogs, pasta salad, and corn on the cob.


After we ate, my boyfriend disappeared out the front door for a minute. I said to my friends, I wonder where he's going, etc, but didn't think too much about it. He brought in a package from Texas and said he had picked it up from the post office and forgotten to give it to me. I recognized the sender's name as Raphaelle from Digital Nails. Boyfriend had asked me a while back to list a few of my favorite indie brands and he would pick me up some polish as a present for getting my new job. Digital Nails was on that list, so I immediately got so excited because I figured that's what this was. There were five bottles inside, numbered and boyfriend said that they had to be opened in order.


I opened them up in order and my first thought was, they are supposed to make a sentence, but it didn't make any sense lol. 1 was DeGrasses' Greener, 2 was Pandorica, and 3 was Dark Matter. I was not picking up on a thing. When I got to 4, boyfriend said it is a custom made polish, and it's name? Kelly! I was so excited - the polish is absolutely stunning and I was so unbelievably excited to see a one of a kind polish that Raphaelle came up with just for me!!

The last one was wrapped differently, in 2 layers instead of one. It felt a lot fatter than the others! When I finally got it unwrapped, I first saw what looked like a galaxy mani in a bottle and some ribbon. When I turned the bottle over, it dawned on me what the label said, and out of the corner of my eye, I see boyfriend getting out of his chair and dropping down on his knee!!


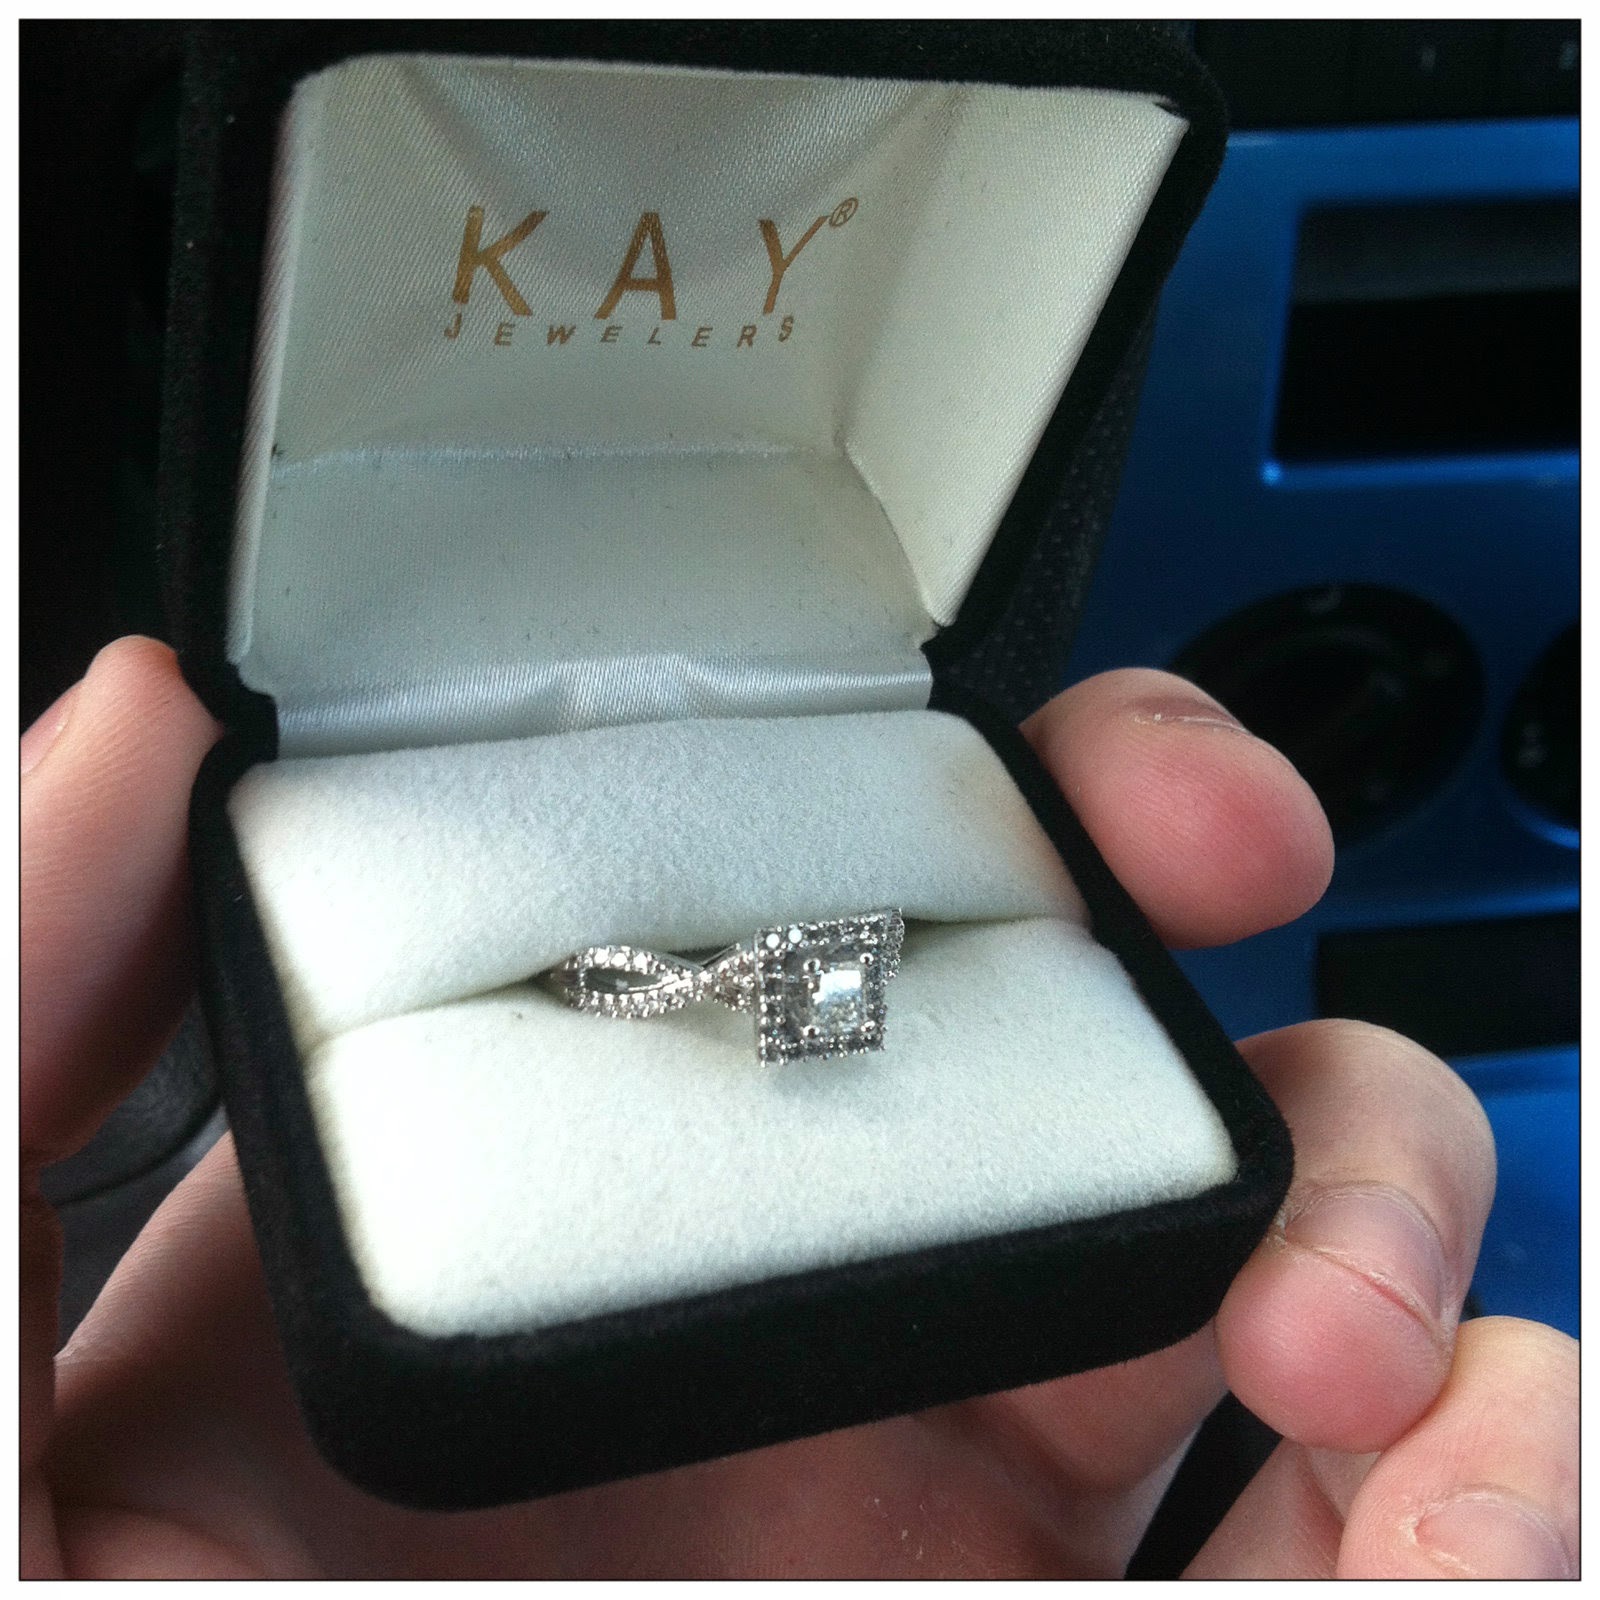
The next few minutes were kind of a blur, I definitely felt like it wasn't really happening and I was dreaming. Of course I said Yes! Then I spent the next few minutes piecing everything together with my friends and talking about all the little things that didn't quite add up that now made perfect sense. I couldn't believe my boyfriend - ahem - FIANCE was able to sneak onto my computer and find the ring picture that I had mentioned 3 years ago...and he found the EXACT ring! It's perfect and I could not be happier!


Here is how the package got put together...fiance took these when he received the package in the mail!


This is what the 5th bottle looked like when I unwrapped it. :)


Here's everything all unwrapped!


I love my ring!


We spent the rest of the evening relaxing and enjoying the cookout with our friends, and we had a nice bonfire going! We had giant S'mores and champagne. It was a truly wonderful night, it could not have been better.


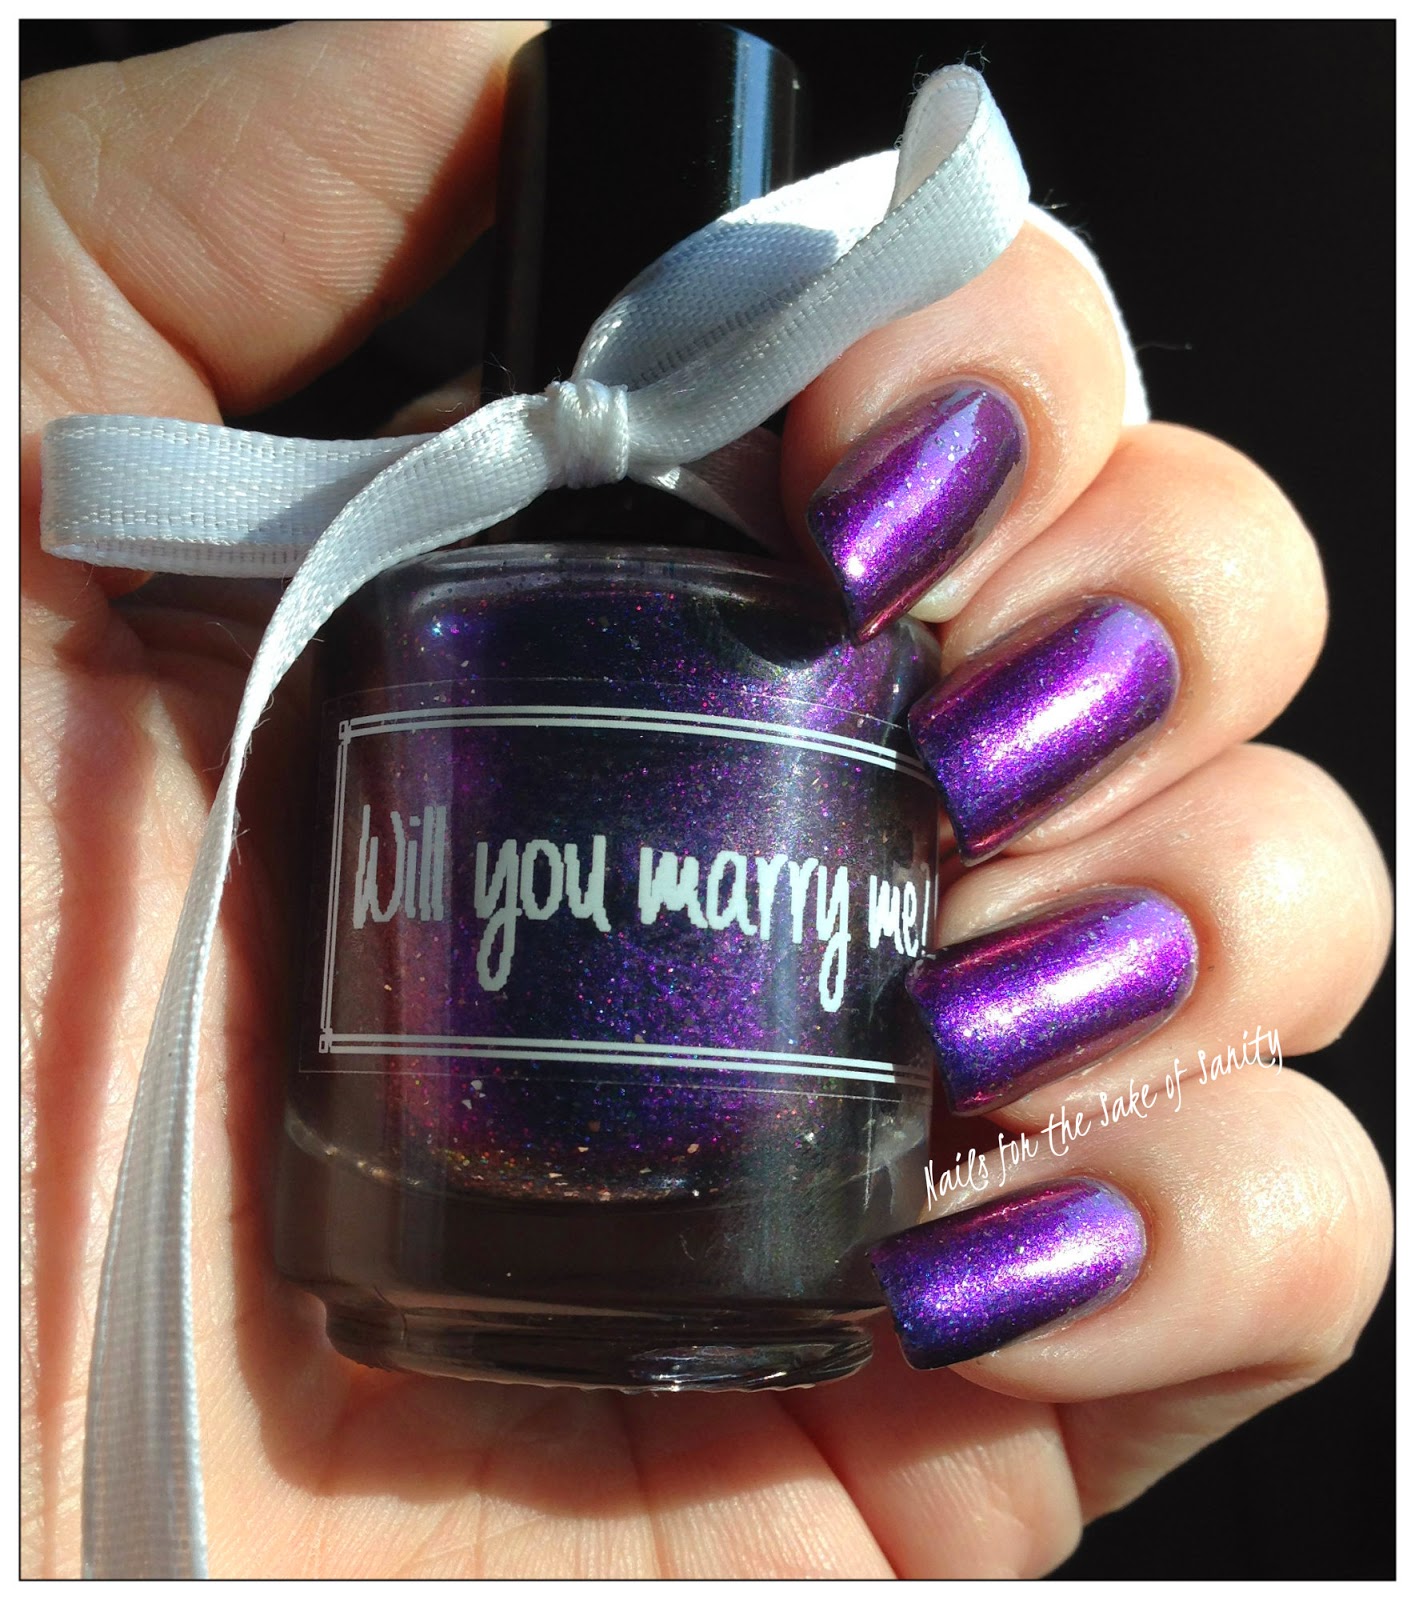
Today, I got some swatches of the Will You Marry Me? polish that Raphaelle created for me!! It is the most amazing polish I have ever seen, and I'm not just saying that because I am biased lol. It's a million different colors in one, and the silver flakies in it makes it look like a starry sky.


It is so hard to capture the beauty of this polish on camera! It looks so much more amazing in person!! I tried to show all the different colors in it, but they still didn't all translate in the photos. :(


I took two photos at different angles in the sun to show some of the extremes of the color shift. Here is one showing the red/purple/pink shade...


And here is one showing the blue/green/tealish shade!


The color shift is stunning alone, but I really think the silver flakies made it! Don't you just picture stars at night?? I am absolutely in love with it! I used three easy coats for opacity here, but I can't wait to try it layered over black. I also want to conserve the polish, so I'll have it forever! :D


So, if you made it to the end - thanks for reading! I have to say thank you SO MUCH to Raphaelle of Digital Nails for making all this possible and for creating two beautiful custom polishes that were a major part of a wonderful proposal!! I'll be posting swatches of the other custom in a couple of days. (I don't want to take this one off!) And, thank you to our friends Ashley and Joe for helping with arranging everything and keeping the secret!! We couldn't be happier :D

<3 Kelly

Wednesday, May 14, 2014

Review: Firmoo Glasses

Hi everyone! Hope you're all safe wherever you are - we're getting a bad storm here in Dayton and we had a tornado warning for a while there...not sure if it's still active, I should probably check that out haha! At the moment, it's just raining really hard and I think it's causing our Netflix to have issues, which is driving me nuts!

But, the interruption in my TV shows has given me a chance to write up a blog post I have been seriously neglecting. I recently was contacted by Firmoo about doing a review for their glasses. I have been meaning to try Firmoo forever, but life has just gotten in the way. Lately, I've been seeing so many people post about them, I just had to see what it was like. 

My first thought was, it sounded too good to be true to be able to just type in my prescription, virtually try on glasses, and done - a full pair of glasses without leaving my couch! But, it's true. This is why, whenever you get your eye exams, ask your eye doctor for a copy of your prescription to have on hand for things like this. What's even better is that Firmoo also has sunglasses, so I can just type in my prescription and get a pair of sunglasses that I can actually drive in! Have you ever tried to put sunglasses on over glasses? Not fun.

Anyway, enough talking! Let's get to the point. When I got the glasses in the mail, I was so impressed with the packaging! First, you see a nice, sturdy drawstring case...


Even better - the hard glasses case that the glasses were in! It's printed like a map! This is the kind of case I would have chosen for myself - it's so cool. I was really impressed that Firmoo didn't overlook any detail. It was all really high quality, branded packaging. 


Also included was a great full size cleaning cloth. You can never have too many of these. I for one am always losing them! I was glad to see that it's larger than the standard cleaning cloths, so it will be harder for me to misplace. :)


And lastly, another thing I wasn't expecting! A great little screwdriver tool for in case the tiny screws in the glasses get loose. It comes on a handy keychain too.


Finally...the glasses! I chose the F028 frames. I really wanted to try something different. I feel like I'm always gravitating toward plain brown or black plastic rectangles. So, I chose something a little bigger, two-toned, and differently shaped than I'm used to. The site has a place where you can upload a photo of yourself and virtually try on the glasses, so you can see what you'll look like before ordering. It was really helpful to see what shapes just did not work with my face, what colors clashed with my hair, etc. No surprises! :)


When I actually tried the glasses on, they looked exactly as they had in the virtual try-on - I fell in love!!! I honestly adore these glasses. It took me a bit to get used to the size, but I think they suit me! Also, I want to point out that the lenses are SO clear, that you could see every detail of my eyes...which was not always a good thing haha! I think my old glasses are kind of scratched up and there's a glare, and the bottom frame goes right along underneath my eye, so you couldn't really notice if I skimped on the makeup or if I had dark circles showing through. I do have to make sure my makeup is on point when I wear these glasses, because the lenses are so crystal clear. I love it though - there is no glare in the sun, and they are coated with a scratch resistant layer as well.


I took these photos while I was getting ready for a party, so you get one shot before I applied my lipstick and one after haha. The glasses just happened to match the shirt I wore, too! :)


So, my overall verdict? I LOVE my new glasses! The prescription is spot on, I can see perfectly and the frames really fit my style! And, I love the idea of being able to shop for new glasses from home, without the whole ordeal of the eye doctor. Eye exams and lenses and frames are SO expensive, and my insurance only allows you to go every 2 years I think...so Firmoo is a great way to be able to change it up in the meantime. Plus, there are tons of great styles of glasses and sunglasses on the site. Check it out by clicking here!

And, I'd love to hear what you think of these glasses below! Or, let me know if you have tried Firmoo and what your experience has been??
Thanks for reading!

Kelly

Sunday, May 4, 2014

Autism Awareness featuring Jindie Nails

Hi everyone! I hope you've all been well. Sorry about my unexpected hiatus, I accepted a new job at the beginning of April and I've been busy getting re-adjusted to the full-time work schedule after being off work for a month. Getting back into a routine is tough! But, I have a bunch of manis backlogged that I plan to get posted for you guys soon. :)

I'm starting with a mani I did recently and LOVED! The Jindie Junkies group I'm in had a theme of autism awareness/blue polishes last month. It inspired me to come up with this fun blue skittle!


I used almost all Jindie Nails polishes for this mani. First, I painted the index and middle finger with Honey Blue Blue, then the other two fingers with Eve. I used Nail Vinyls for the zebra print. I painted over the Vinyls with Jindie Blue Blue Xmas (index) and Orly Frisky (pinky). I used the stamping decal technique seen here at Chichicho for the puzzle pieces! Topped off with HK Girl and done :)


I tried to get pictures in the sun, but there weren't a lot of sunny days when I had these on, so I did one with flash.


I'd love to hear what you think of this mani! I really liked the combination of all the blues together, and I love the puzzle pieces! I am so glad I discovered the stamping decal technique on Chichicho's blog!! :)

Thanks for looking!
Kelly

Tuesday, April 8, 2014

Nail Art Society: Habit Denim Kit!

Good morning loves! Today I have another amazing Nail Art Society kit to share with you! For this one, NAS has partnered with Habit Nail Polish for a fun denim-themed kit. Subscribers will receive one Habit nail polish in either Belle Epoque, which I received, or a darker blue. Subscribers will also receive 2 sheets of zipper water decals as well as an orange stick. This whole kit came wrapped in the cutest denim print tissue paper - such a nice touch! :)
Habit Belle Epoque and zipper water decals in gold and silver

Habit Belle Epoque and a printed Nail Art Society bag
Habit Belle Epoque
The top of the Habit cap - so pretty!
 I wanted to add some more color to the mani, so I chose a darker blue (Sinful Gel Shine - ) that I thought might be somewhat similar to the darker blue that some subscribers will be getting in this kit! Now for the best news - Belle Epoque is actually a ONE COATER. I ended up doing two coats out of habit and because I wasn't careful enough with application, but one coat is actually enough for full coverage. :)


The cool thing about Habit is that is actually has myrrh in it! I thought that was really cool - and completely unique! I had never heard of that before. The packaging explains that the myrrh is a natural nail strengthener, and also has anti-inflammatory, antibacterial and anti-fungal properties. What all that means is that it's good for your nails without any harsh chemicals! Add that to the fact that they offer gorgeous shades with perfect formulas, and I'm hooked! :)


I will warn you - though the packaging says stickers, these zippers are most definitely water decals. I sat there for a good few minutes trying to peel them off before I realized, haha! Once I figured that out, they were easy to work with. I simply cut out the specific decal I wanted, dropped it in a shot glass of room temperature water for about 30 seconds, took it out with nail art tweezers and the decal slid right off onto my finger. I like to wet the nail that I am about to place the decal on first, so I can easily slide it around and get it where I want it. Add a layer of topcoat to seal the decal in, and you're good to go! :)


I think the gold zippers would go well with the darker blue polish, but I wanted to test out the silver ones here. I've seen some other nail artists use these decals over a sort of "distressed" denim look, so I definitely want to try that too! Really, I think there are a ton of possibilities with this kit. :)


All in all, I thought this was an awesome kit. I love the decals and see myself getting a lot of use out of them. And, I'm totally in awe from my first experience with Habit. I'm dying to try some of their other shades, specifically Sweet Life - Habit's take on Radiant Orchid! Love it. :)
So, what do you think about this mani? Have you tried Habit? I'd love to hear below! And if you would like to subscribe to Nail Art Society, click here!
Thanks for reading! <3
Kelly

Friday, April 4, 2014

Polish Me Silly: Hypnotic

Hi everyone!! Happy Friday! What do you all have planned for the weekend? I plan to do some swatching, maybe some nail art, and definitely a lot of relaxing because I start my new job next week. :) I want to take full advantage of the time off while I still have it.

Today, I have an amazing polish to share with you, that is truly unlike any other that I have in my collection.


I was actually gifted this polish from a lovely Reddit user! The contest was to find the sparkliest polish you could, and this was the one I chose. It's so interesting to me that this isn't really glitter, it's actually sterling silver flakes - which makes it insanely reflective. I wasn't sure what to expect as far as formula since it's actually silver flakes. I kind of expected a rough texture, like glitter shreds or shards would have. However, it wasn't like that at all - I used three coats of Hypnotic with no base color, and the polish felt completely smooth! Seriously, even before topcoat! I added topcoat only to extend the length of the mani, but it wasn't necessary for shine or smoothness.


This is honestly one of the most gorgeous polishes I have ever worn. I couldn't stop staring at my nails! You could even see the camera or my face reflecting off the nails in some of the photos I took. I also want to point out that removal of this polish was just as easy as application. It wasn't hard to remove like normal glitters, but it did require a bit more scrubbing than a normal creme. It's fine to wear this one with a normal basecoat - no need for glue or Yellow Stopper.


Be sure to check out Polish Me Silly's Etsy shop - there are loads of stunning blends! And click here for a direct link to Hypnotic. This is a great polish to add to your collection - it is completely unique and makes for a stunning nail look that is quick and easy to apply. This would be perfect for a night out! I know I will definitely be wearing this a lot on my toes in the summer too. :)

What are your thoughts? Do you own this polish or one like it? I'd love to hear below!
Thanks for reading! <3
Kelly

Thursday, April 3, 2014

Jindie Nails: Re-Fresh to Death

Good morning loves! Today I have a swatch of an upcoming Jindie Nails polish...Re-Fresh to Death!
This polish will be released on the Jindie Nails shop site on April 5th!! Be sure to follow Jindie Nails on Facebook too to stay up to date on official times of restocks and new releases. :)

Now onto the polish! 
Here is the description from Jen:
"Re-Fresh to Death has a white crelly (cream/jelly) base loaded with small, metallic hexagons in sapphire blue, lilac, periwinkle, magenta, mauve, lavender & dark purple."


To me, the base in Re-Fresh to Death looked more white in the bottle, but once I got it put on, it almost looked like a very very light lavender or lilac! Could be my eyes deceiving me though, lol! Tell me what you think...

I used three coat for these swatches and added HK Girl topcoat. This baby is packed full of glitters, but just one coat of topcoat smoothed everything over. The crelly base and all of the different glitters combine to give this polish a wonderful depth! It's so fun and bright for spring. Formula was perfect as usual - I would expect nothing less from the crelly queen. ;)


I'd love to hear your thoughts on this one! I think it's perfect for this warm weather we've been having. And I love this mix of glitters together. It reminds me of berries! :)
Don't forget to mark your calendars - Re-Fresh to Death will be releasing at JindieNails.com, on April 5th, along with Bonnie & Clyde (Duo with Dollish Polish), Pink Stilettos (Collab with Ria Polishaholic), and Wifey Material!

Thanks for reading! <3
Kelly

Monday, March 31, 2014

Half Frame Mani with OPI and Rainbow Honey

Hi everyone, happy Monday! Today I wanted to share with you a quick and easy nail art I did a while back for Valentine's Day. I wanted something soft and feminine, and this is what I came up with!


I was so excited with OPI came to Sally's! I picked up a few shades that I'd fallen in love with after seeing swatches. One of these was You're Such a Budapest - such a gorgeous light shade of purple. Two perfect coats was all that I needed for this look and it was also enough for full coverage. From there, I did a little curved sweep around the nail using Rainbow Honey Sakura Matsuri. I played around with placement of the flowers just using the polish brush that came in the bottle. For the accents, I just did one full coat of Sakura Matsuri. One coat of HK topped it all off! :)


I absolutely loved this look, and I got lots of compliments on it! I love the way the glitters shift colors in different lighting. What do you think of this mani? I'd love to hear your thoughts! <3

Kelly